Glass, Metal and Silicium
http://gabriel.mp3-tech.org/blog/index.php
Internet Explorer Javascript Strangeness
http://gabriel.mp3-tech.org/blog/index.php?entry=entry110310-232402
Pic a Day gallery had with Internet Explorer: For any reason, IE (tryed on IE6, IE7, IE8) is unable to dynamically create a not yet declared variable when you directly affect the result of some function.
Javascript is supposed to automatically create global scope variable if you affect something into an undeclared variable:
foo = 5;
...will instanciate the global "foo" variable if not yet declared. However, if you assign the result of some functions to an unexisting variable, IE simply fails and stops evaluating the funtion where the issue occurs:
foo = document.getElementById('bar');
Assuming there is a element called 'bar', then this line fails if 'foo' is not yet declared (but this works as expected under Firefox 3.x). Declaring 'foo' before using it solves this Internet Explorer issue:
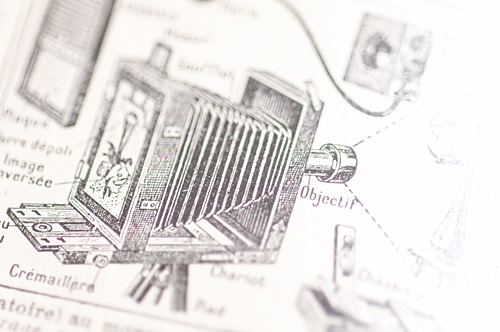
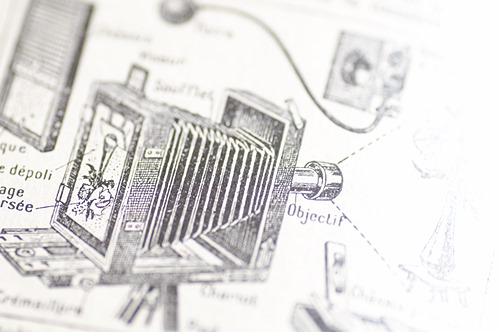
var foo; foo = document.getElementById('bar'); ]]>Photo Recipe: Architectural Blueprint, step by step
http://gabriel.mp3-tech.org/blog/index.php?entry=entry101128-204706
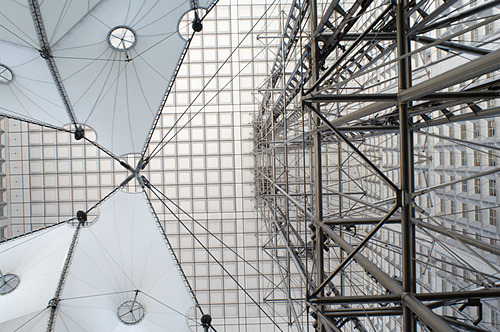
I used the inner structure of the Arche de la Défense, near Paris:
Shooting vertically inside this building provides a nice nearly symmetric pattern, with the roof tiles creating a background pattern:
(this one is shot with a fisheye (17mm), thus the distortion)
Find a good position:
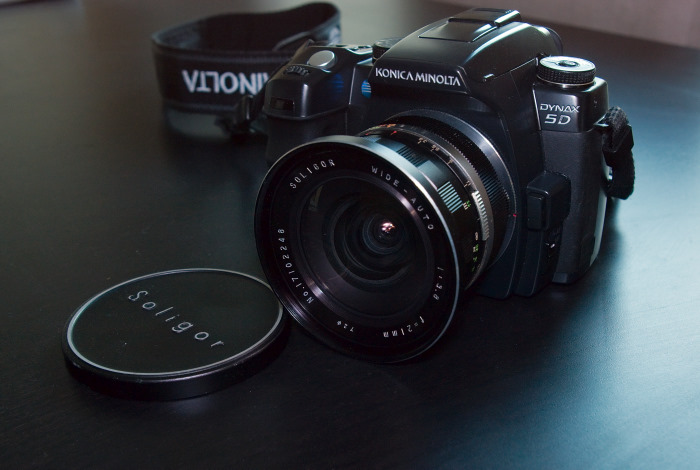
I used my old 21mm Soligor lens, which has the advantage of featuring a nearly non-existent distortion.
Now, let's start the tricks...I placed a graduated sunset filter over the lens, in order to provide an orange gradation. This is a Cokin square filter (inside a P-size holder), which is quite easy to position over the big front element of this lens.
A graduated orange color might seems to be a strange idea, but once you turn the picture into negative, it starts to be quite neat:
White areas turned into black, and orange turned into blue (its complementary color). The pattern from the roof tiles now seems to glow in blue over black.
Tweak curves a bit in order to darken the "wings":
Reduce saturation in order to tune down the blue glow:
Add a final small tweak to curves, and clone out a big dust bunny over the front lens (which happens often when shooting vertically for a long time):
Now just add some borders, and here we are, a blueprint-like done from a real picture, with only minimal post-processing:
(picture from my 2009 pic a day gallery)]]>Photo Recipe: Summer salad, step by step (food photography)
http://gabriel.mp3-tech.org/blog/index.php?entry=entry100912-223530
challenged us to do a photo remake of Matt Armendariz's Ultimate Summer Salad. The key points are: *non-lettuce salade *landscape composition *strong rear light
Here is how I created my shot, step by step:
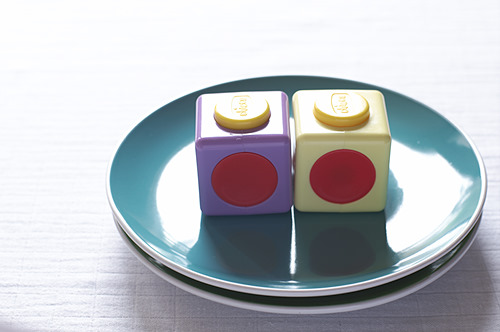
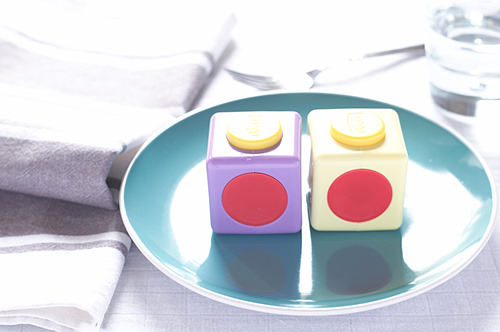
First, set up a placeholder within the plate:
As setting up the shot is usually not done in a snap, using a placeholder allows me to not having to rush while the food is starting to die. When you shoot real food, it's amazing how fast it is decaying. Light within this set-up is coming from two rear windows, one directly behind the plate and one on the rear-left (as you can guess from the shadows casted by the cubes).
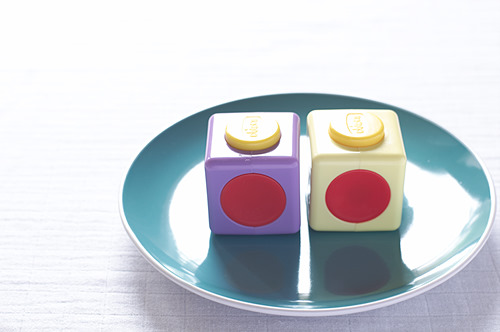
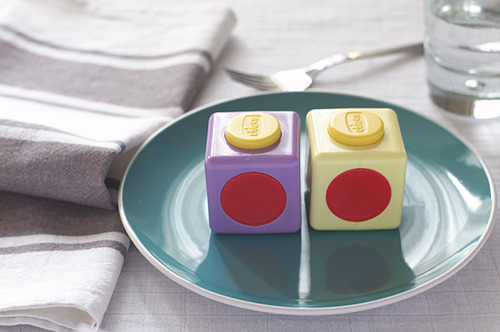
Add a reflector in front of the plate in order to reduce shadows:
The "reflector" is actually a simple regular white paper sheet.
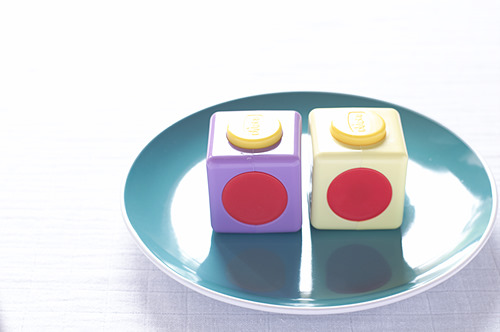
Another reflector on the front right:
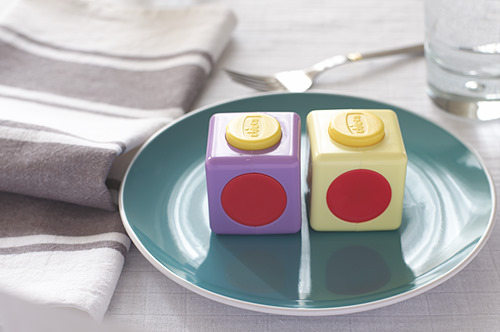
And yet another one on the front left:
Notice how significant is the change provided by three simple paper sheets acting as reflectors, compared to the first shot.
Set up the props:
Soften the rear light (ie extend a bit the window's curtain), and adjust exposure:
I decided to soften a bit more the rear light and to remove some of the distracting higlights:
I completely filled the glass which is on the right, and added an other glass on the rear left (outside of the frame) which would cast a slight shadow over the fork, slightly reducing the shiny highlight.
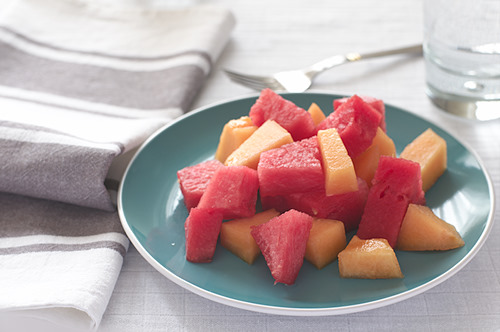
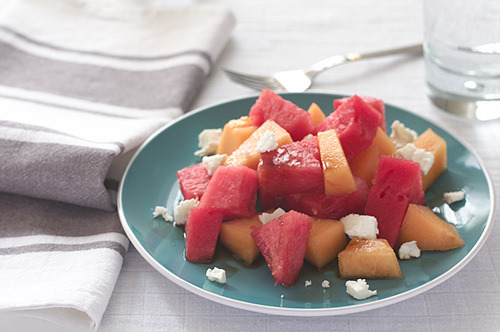
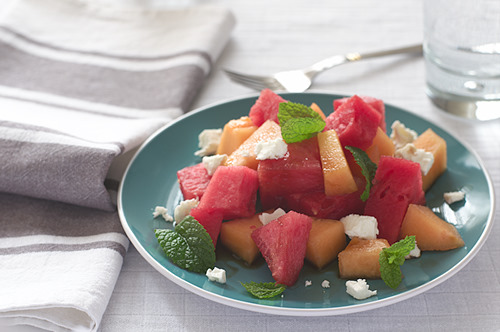
Set up the food within the plate:
Special care should be took when positioning the leaves, in order to have some of them pointing upward with the light going through them, as this really improves the shot.
The shot looks a bit washed up as it is slightly overexposed (I prefer exposing to the right in order to reduce noise in the shadows)
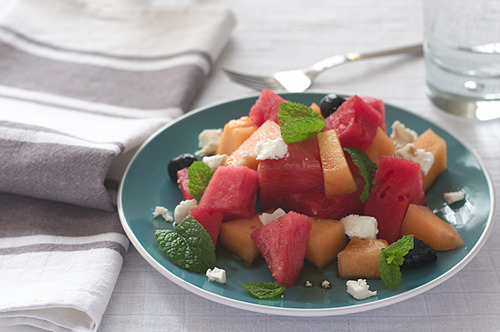
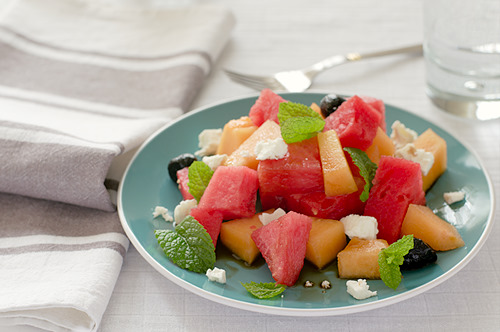
After some slight adjustments done within the raw converter, here is the result:
And while everything is set up, don't forgot to shoot a few alternate versions: ]]>Some Planar 50/1.8 shots
http://gabriel.mp3-tech.org/blog/index.php?entry=entry100712-210926
2009 pic-a-day gallery:
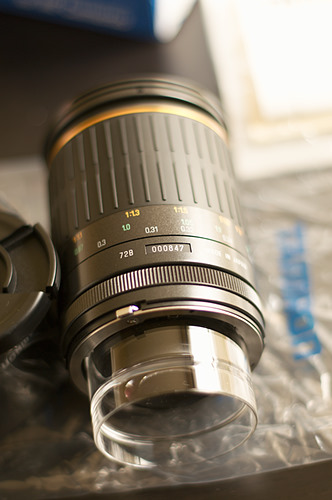
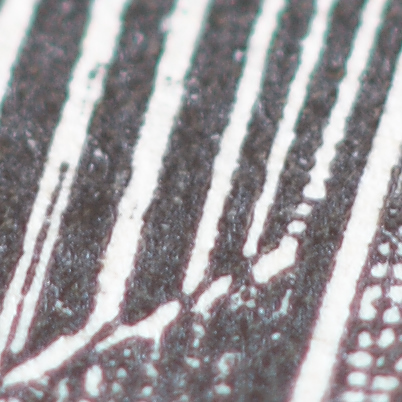
This comparison is between 3 90mm macro lenses: *Panagor PMC 90/2.8 (m42 screw mount version) *Tamron Tamron Adaptall-2 SP 90/2.5 (52B) *Tamron Adaptall-2 SP 90/2.8 (72B)
Both the Panagor and the 72B are going up to 1:1 magnification, while the 52B only goes up to 1:2 (you need either an extension tube or a teleconverter to reach 1:1). However the 72B, like most modern macro lenses, only reaches 1:1 by altering its focal length. At 1:1 its focal length is about 70mm, requiring to be closer to the subject than using the Panagor (or the 52B on extension tube). The Panagor and the 52B have a metal barrel, while the 72B is a mix of metal and plastics.
I am mostly interested to check how those lenses compare regarding flare, as this is the biggest issue with the Panagor: under high exposure, it has a strong tendency to produce a low contrast image, contrast being significantly lower on the center of the picture.
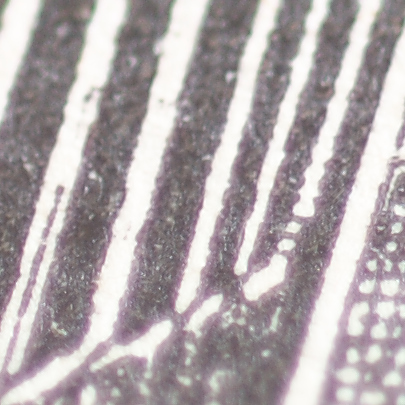
Here is an example of such case with the Panagor:
This can be corrected in post-processing, but I'd prefer not to have to do it. Corrected version:
Here is the shootout, manual white balance and manual exposure, so any difference is because of the lenses.
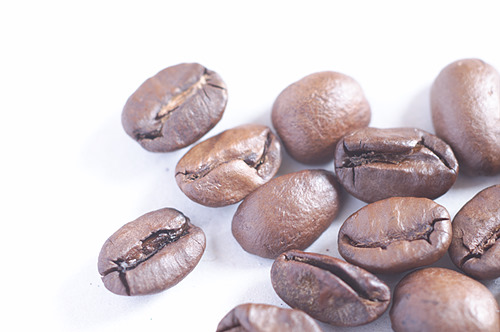
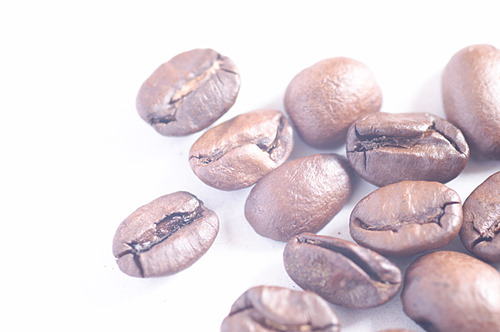
Set 1 - f/2.8, 1:2 magnification:
Panagor
52B
72B
And some 1:1 crops (from a Pentax K7 - 14.6MP/APS-C):
Panagor
52B
72B
Set 2 - f/5.6, 1:2 magnification:
Panagor
52B
72B
*Resolution: There is not much difference between contenders. The Tamrons might be slightly sharper than the Panagor on the f/2.8 shot, but that is a quite small difference. Those three lenses are all providing quite good sharpness.
*Color: The 52B is slightly warmer
*Exposure: It is clear that even when using the exact same exposure parameters, the 52B and 72B are gathering more light than the Panagor. Either the Tamrons have better coating, or the f/2.8 rating of the Panagor is a bit optimistic (it seems to be about f/3.2). It could also be a combination of both explanations.
*Contrast: Under those intentionally difficult conditions, it is clear that the 52B is the one suffering most from a contrast issue. Both the Panagor 90/2.8 and the 72B are significantly better than the 52B, with a slight advantage toward the 72B featuring a slightly better contrast and more vivid colors than the Panagor. ]]>Two 21mm lenses, 30 years apart
http://gabriel.mp3-tech.org/blog/index.php?entry=entry100403-142404
My 30 years old 21/3.8 Soligor lens (in T4 mount, used with an m42 adapter)...
...and the newly designed lens, SMC Pentax DA 21mm F3.2 AL Limited:
Pros of the Vivitar/Soligor lens:
*Universality: As a T4 mount, it can be used on any camera able to use m42 lenses, but also on Nikon SLRs. The Pentax, on the other hand, is a K mount lens which can only be used on Pentax SLRs/DSLRs. Moreover, the Vivitar/Soligor is a full frame lens, while the Pentax one is an aps-c only lens.
*Very low distortion. The Pentax lens has some slight barrel distortion that can be easily corrected in software, but that implies a new processing step within the workflow.
*Low vignetting. The Pentax lens exhibit noticeable vignetting when used wide open (but it nearly vanishes by f/4).
*The focus ring: The very long focus throw of the Soligor lens is significantly easier for manual focusing or prefocusing. The Pentax focus throw is only about 1/8th of a turn. The focus ring of the Pentax lens is very tiny, while it is comfortably large on the Vivitar/Soligor.
*Aperture ring: There is simply no aperture ring on the Pentax lens.
*Price: A second-hand Pentax 21/3.2 is priced between 4x and 6x the price of a second-hand Vivitar/Soligor 21/3.8.
Pros of the Pentax lens:
*Size and weight: The Soligor lens weights 380g against 140g for the Pentax one. The Vivitar/Soligor is using 72mm filters, while they are 49mm on the Pentax lens (or 43mm if you put the filter inside the provided lens hood).
*Flare: The Pentax lens is significantly more flare resistant (but it still flares a bit)
*Chromatic aberrations: CA are significantly lower on the Pentax lens.
*Sharpness: This is a strong point of the Pentax lens when compared to the Soligor/Vivitar lens. Moreover, corners are significantly less sharp than center untill f/11 on the Vivitar/Soligor, while there is much less difference between center and corners on the Pentax lens. That being said, when compared to other prime lenses, the 21/3.2 AL Limited is not a very sharp lens.
Similar between the two lenses:
*Build quality. The Pentax lens features a metal body, including the front cap and the lens hood. Marking on the lens are engraved before being painted, and overall build feels quite sturdy. It's similar to the Vivitar/Soligor lens (as 30 years ago a sturdy metal lens was the norm).]]>Trying some food photography
http://gabriel.mp3-tech.org/blog/index.php?entry=entry100127-135749
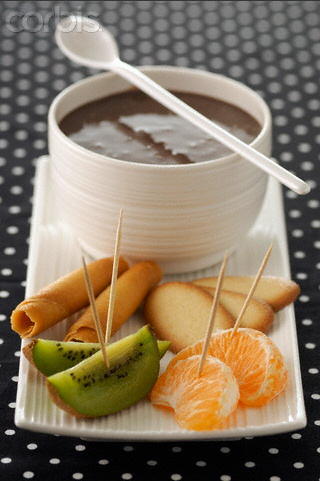
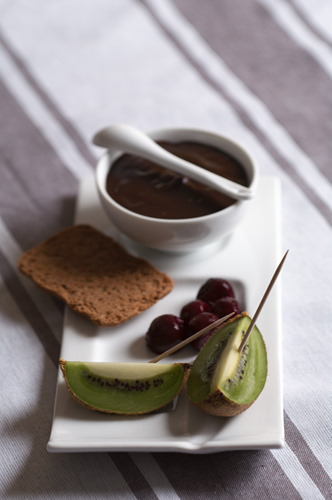
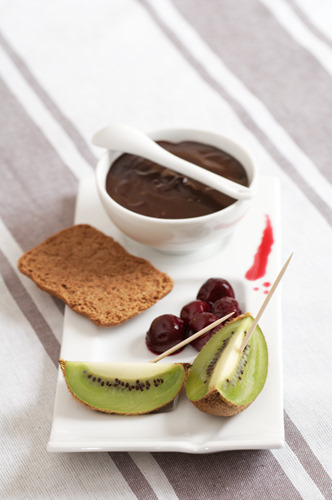
I decided to copy this one:
It is from the Corbis library (copyright Riou/photocuisine/Corbis).
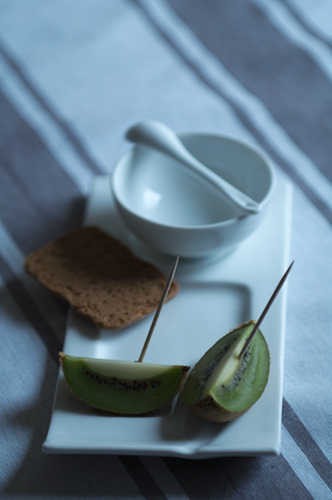
First shot with most of the set-up done, natural light from a window on the right:
Set white balance manually using the plate:
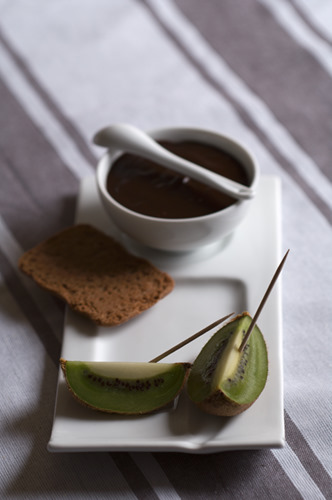
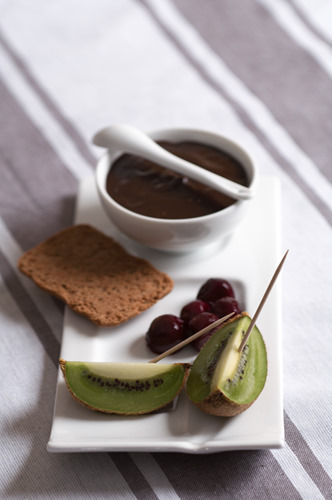
Add the chocolate. I did not put it earlier, as I was afraid that the spoon could drop into it while setting up the composition.
Add some cherries (not earlier as I was afraid that they could start dripping), and increase exposure time from 1/4th of a second to 1/2 second.
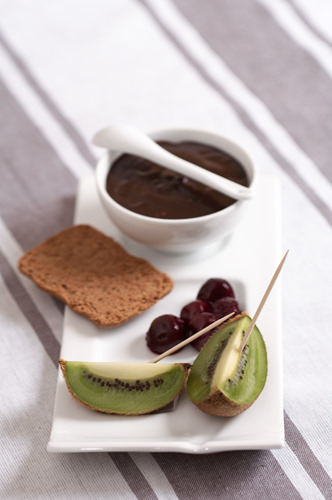
Add some fill light on the front left in order to reduce shadows. I could have used a reflector, but I used a flash (wireless).
Increase the fill light power, once it is correctly positioned. As most of the light is still natural light, there is no real need to update white balance because of the fill-in flash.
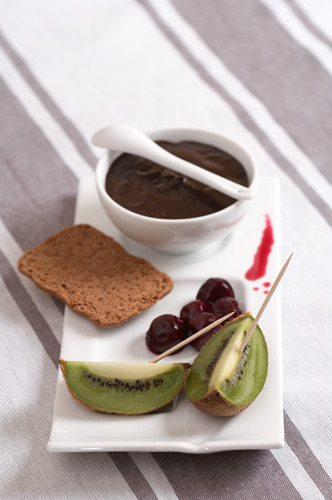
Add a touch of style, and increase depth of field by 1 f-stop.
Increase exposure time from 1/2s to 1s.
And finally clone out those ugly reflections from the flash on the front of the plate.
(this picture is available within my 2010 pic-a-day gallery)]]>Some SMC Takumar 85/1.8 shots
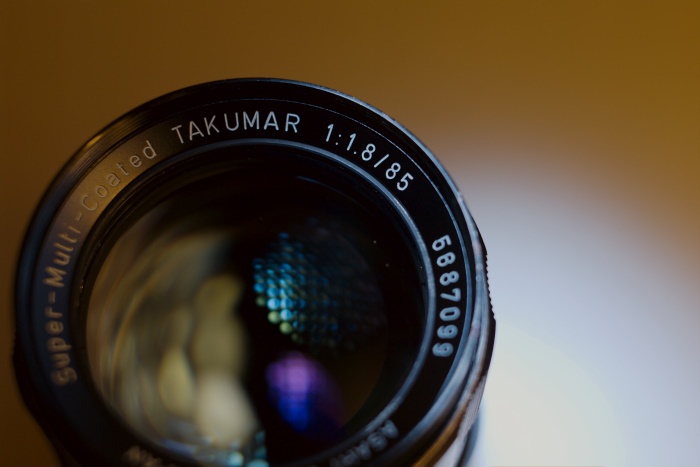
http://gabriel.mp3-tech.org/blog/index.php?entry=entry091223-152735
Here are a few shots from the Super-Multi-Coated Takumar 85/1.8 (M42 mount):
;)
;)


;)

;)
;)
;)
;)
;)
;)
;)


;)

;)
;)
;)
;)
;)
;)
;)
;)