
Saturday, November 15, 2008, 11:41 AM - Photography
I've read many times that old pre-digital lenses might not be suitable for use on DSLR because of their weak coating. I was also aware of those tests by Pete Ganzel regarding sensor flare.Short explanation about sensor flare:
Digital sensors are highly reflective (way more than film), and so light coming through the lens can be bounced on the sensor, go back through the lens, and be bounced back from lens elements toward the sensor. This can produce a central flare on pictures.
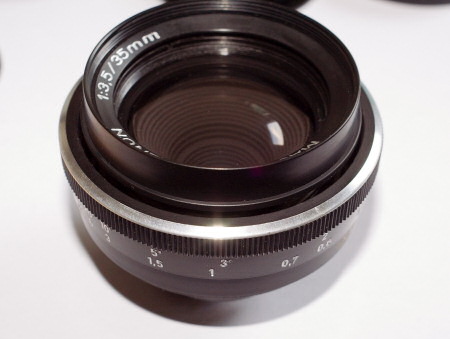
Even being aware of this, to me the connection between sensor flare and lens coating was only theoretical, as I had never seen any real test of this. This was until I got a 55mm f/1.4 Tomioka lens. This is an old manual lens in m42 screw mount, from way before digital era.
This is the the first lens on which I noticed sensor flare (and until now, my only one). When shooting wide open, there is no noticeable issue, but when closing down aperture, from about f/4 it is producing a central highlighted area with reduced contrast. (sometimes not noticeable, sometimes highly noticeable).
Here is a sample of sensor flare from this Tomioka lens:
;)
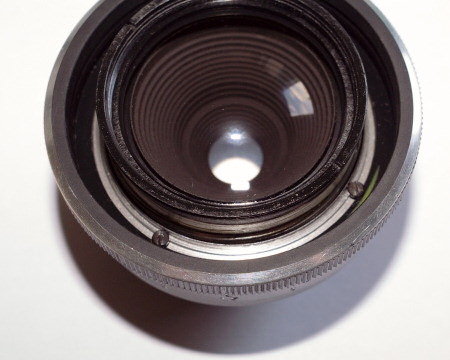
On this picture, the aperture shape is very noticeable, which implies that light is bounced from the sensor to a lens element located in front of the aperture before being bounced back.
After a few months, I was able to find a multicoated version of this lens:
;)
The branding is different, as Tomioka lenses were most often sold as rebadged lenses, but both samples feature the exact same optical design. What can be immediately noticed is that the single coated version mainly exhibits yellow reflections, while the multicoated version exhibits strongly colored reflections.
And then, the multicoating effect proved to be really worthwhile: no more sensor flare noticed on my pictures, whatever the aperture. As both lenses design or otherwise identical, this is an clear demonstration of the multicoating effect regarding digital photography.
Finally, two test shots of a white surface with lenses closed to about f/5.6:
Single coated version of this lens ("Super Reflecta"):

Multi coated version of this lens ("Porst Color Reflex MC Auto"):

| 0 trackbacks
| permalink
| related link
Monday, October 20, 2008, 01:36 PM - Photography
Since about 2 years ago, I am using a KM5D, and lately, I mostly switched from AF lenses to MF lenses. However, our current viewfinders are not that good for manual focusing, compared to pre-AF area film SLRs.Sure, an a700 features a bigger viewfinder, but I did not felt like spending that much money for such an upgrade. There are many things that are way better on the Sony a700 than on the 5d, but many are not really relevant to the way I'm shooting. I looked at possible alternatives (including K10D and K20D), and after a long evaluation, I finally selected what was (to me) the best choice right now: going Nikon.
I ordered a Nikon DK-21M, which is a magnifying replacement eyepiece, featuring a 1.17x magnification, and put it on my Minolta 5D.
*Does it fit?
Yes, it fits. Nikon eyepiece is about 2mm larger than Minolta's one, but I did not noticed any particular lateral play with this combination. I also tryed it on a Pentax DSLR, and it's a perfect fit.
*What about eye sensor?
Yes, that is a problem. Minolta/Sony eyepieces are cut at the bottom to accomodate for the eye sensor, while Nikon eyepieces are covering the 4 sides. The DK-21M being a bit bigger than a Minolta eyepiece, you can put it on the camera withoout pushing to the very bottom, allowing the eye sensor to still work. I will perhaps have to put a kind of rim within the alternative eyepiece to ease this.
The results:
* Viewfinder is significantly bigger. 5d is 0.83x magnification, so it's now 0.97x. As a comparison, a 7D or a700 is 0.9x.
*My manual focus accuracy is greatly improved. Now my focus is most of the time spot on, as confirmed by the AF sensor. (I have an af-confirm m42 adaptor)
*Viewfinder is just a bit dimmer (half a stop?).
*DK-21M requires a diopter adjustment. Beware of this if you are already using the maximum diopter adjustement.
*With eye glasses, I am unable to vew the whole picture, because of the reduced eye relief. Fortunately, I can still shot without my glasses.
The unexpected part: DK-21M is the eyepiece magnifier. It comes with a tinny rubber eyepiece (DK-16) glued on it. This eyepiece is likely the most uncomfortable one ever made! As it's rubber only (no hard/solid part), you can gently unglue the DK-16 from the DK-21M, using only your fingers.
I ordered a replacement eyepiece (DK-20), and put it on the DK-21M.
Overall, I am very pleased by the result. That is probably the best price/benefits upgrade I could have for my 5d. As it's very cheap and totally reversible, I'd encourage any manual shooter (without eye glasses) to try this.
Stock Minolta/Sony eyepiece:
;)
Nikon DK-21M eyepiece magnifier:
;)
Nikon DK-21M eyepiece magnifier with DK-16:
;)
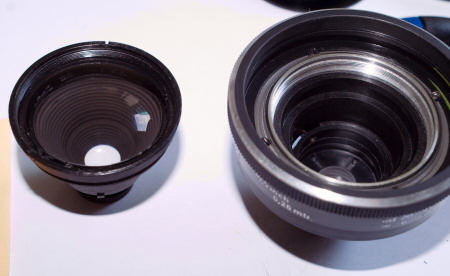
Saturday, September 27, 2008, 06:34 PM - Servicing
Here is a repair guide for this m42 lens: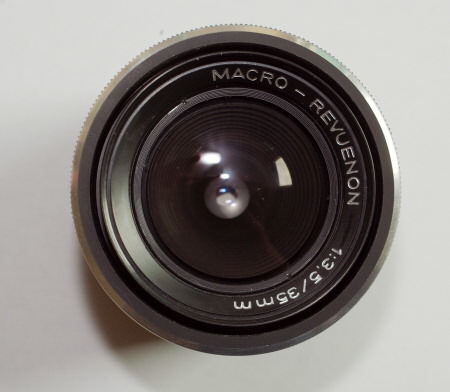
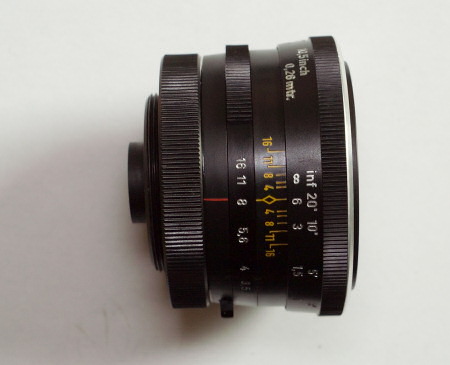
Even if "macro" is mentioned, this is not a macro lens. At best it is a close-up lens, but not macro. It is obviously designed to be really cheap to manufacture, as the body is entirely made of cheap plastic, except 7 screws and the diaphragm blades (the whole lens weights only 130g). It is a preset lens, in order to save a bit of money on the manufacturing (no need for any mechanical linkage).
As Revuenon did not produced lenses, this one is available under several different brandings.
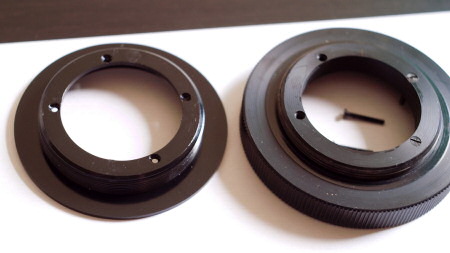
First, remove the 4 rear screws:
Remove the rear part, and you should now see this :
Surprise! There is yet another mount thread. The first ring we removed is in fact a T to m42 adapter, and the lens is indeed a T mount lens (probably in order to easily be sold for different mounts).
Remove the rear ring.
The two rear rings that we removed :
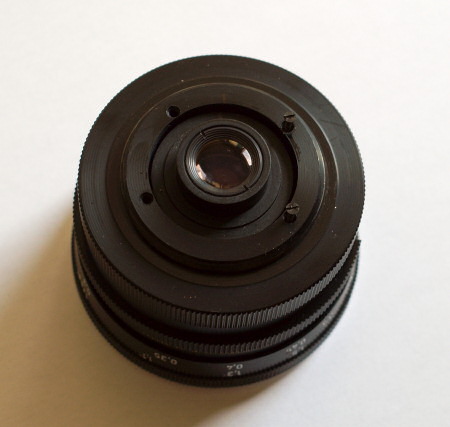
Remove another rear ring, and you will see this :
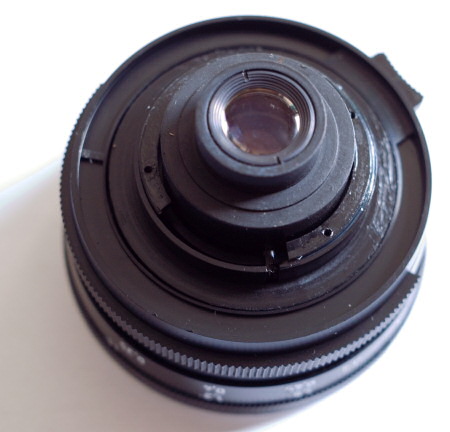
Once again, remove the rear ring, up to this step:

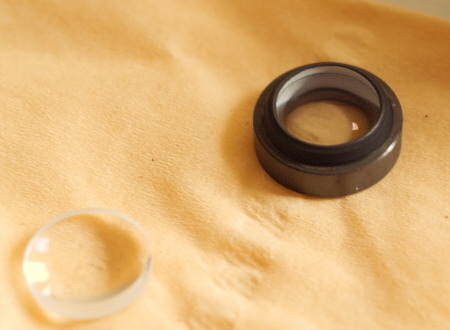
Now, let's start to remove optical elements. Remove the rear ring (using a lens spanner or a similar tool) and the rear optical element.
Rear optical element :
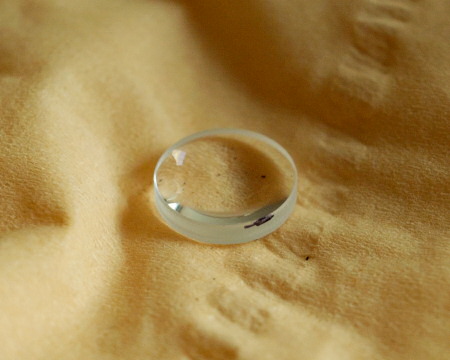 Dont"
Dont"I've put a soft pencil mark on the side of the glass element, toward the front, in order to remember which side goes front when remounting the lens. Usually, each time I remove an optical element, I do this.
Lens body with the rear element removed (rear ring on the right) :
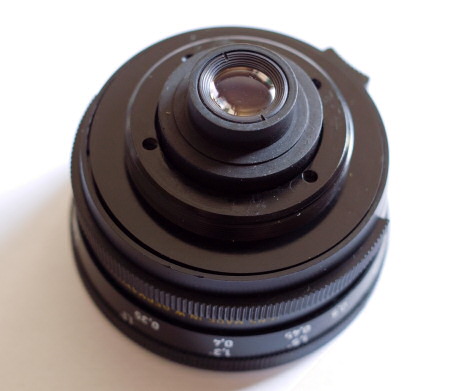
Remove another optical element from the rear :
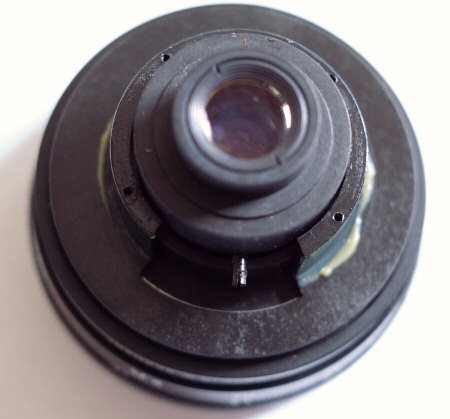
Now, let's have a look at the lens body from the front side :
Unscrew the front ring :
Unscrew the center part from the body :
Don't think about removing the front optical element, as it is glued to conical plastic part.
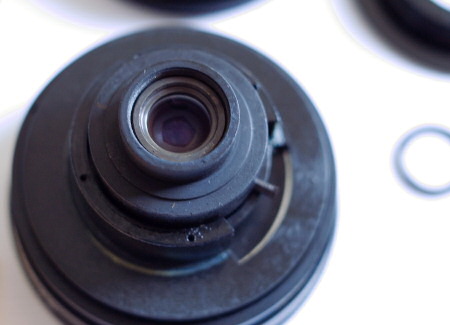
Under the conical element, there is one last ring which can be removed, and allows access to the last optical element (the one I wanted to clean) :
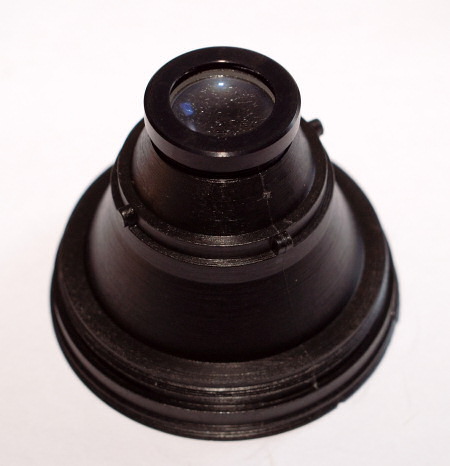
And here is it, we have removed nearly every possible part.
Sunday, September 14, 2008, 06:47 PM - Web
Having a line of text which is as wide as its container width, sound simple? Well, actually it is not that easy.For my pic a day gallery I wanted to put a navigation interface under the thumbnails, and to have this navigation interface extend to the full possible width. Of course, as the width changes according to the browser window, it can not be specified in pixels.
A possibility would be to use a single row table, and to put each navigation element within an individual table cell, but first it is far from an elegant solution, second I did not thought about this possibility when doing the navigation interface.
As the navigation interface is made from text elements, I thought about simply using the text-align: justify CSS property. However, this doesn't justify the last line of a paragraph, and in my case the navigation interface is a single line. CSS3 is supposed to address this issue, by the text-align-last property, which allows to set justification method for the last line of a paragraph. Problem: it is not yet supported by browsers.
So here is the trick: using Javascript to increase spacing between words, until it fills the whole container width.
First, set a small words spacing, then iteratively increase it. While doing this, check the element height. When the height increase, it means that your text was wrapped over a new line. You can then roll back words by one step, and you are done: your line now fills the whole width:
function expandNavigation() {
document.getElementById('config').style.opacity = 0;
navi = document.getElementById('navigation');
navi.style.opacity = 0;
var h0 = navi.scrollHeight;
var em = 0.2;
var em_inc = 0.2;
do {
em += em_inc;
navi.style.wordSpacing = em + 'em';
} while (navi.scrollHeight == h0)
em -= em_inc;
navi.style.wordSpacing = em + 'em';
fadeIn('navigation', 0, 15);
fadeIn('config', 0, 15);
}
In order to avoid flickering while the word spacing is increased, I also hid the text while iterating, and only made it visible again at when the optimal word spacing is found (the function fadeIn sets the text back to its visible state).
Back Next
 Calendar


